Responsive Ad Slot

Hot Stuff

SEO

Tech

Showing posts with label Blogger. Show all posts

Insert Adsense or Chitika Ad Code Between Post Title and Body{Easy Way In Blogger}

Posted on with No comments
I think this is the best and easy way to insert Adsense Code below the post title or between post title and post body(insert adsense into blogger post).That is why i am sharing this for you.If you are using your blog for Monetization purposes. One thing that you need to put into consideration is  your ad placement.To earn higher money by ads you should do this it may help for high CTR which is equivalent to a higher earnings.

If you are using Blogspot (Blogger), you will notice that Google gives you a few option of how to place  your adsense but it doesn't show you how to place in between the title and post.  For other bloggers using other ads Networks like Chitika, Infolinks then you just have to put the code manually.

First you need to convert  the code that you got from Chitika or Google Adsense to XHTML. There are so many programs on the internet that you can use to do this but one that I like and I have used is Eblogtemplate and Cstnetwork.  Simply copy and paste your code from Chitika or Adsense then click on convert.  No need to worry since Google won't penalize you for doing this.


Putting your Chitika or Adsense code ad in between the title and the post body:

  • Go to Blogger - Dashboard - Design- Edit HTML
  • Click on Expand Widget Templates
  • Using Control + F
  • Search for <data:post.body/>
  • Go back to the program that you used to convert your code and copy the Chitika or the Adsense code.
  • Just before or above <data:post.body/> . Copy and paste the following codes;
             <b:if cond='data:blog.pageType == &quot;item&quot;'>
             followed by Your Converted Chitika or Adsense code 
             </b:if>
             <data:post.body/>

  • You done successfully.
Example for Insert Adsense or Chitika Ad Code Between Post Title and Body
Insert Ad Code Between Post Title and Body
(Example Screen shot)

                                                                ..:: OR ::..                               

If you want to show Advertisement (Ad) on Left side:

            <b:if cond='data:blog.pageType == &quot;item&quot;'>
            <div style="float:left;">
            followed by Your Converted Chitika or Adsense code 
            </b:if>
            <data:post.body/>


If you want to show Advertisement (Ad) on Right side:

            <b:if cond='data:blog.pageType == &quot;item&quot;'>
            <div style="float:right;">
            followed by Your Converted Chitika or Adsense code 
            </b:if>
            <data:post.body/>


If you want to show Advertisement (Ad) at the Center:

            <b:if cond='data:blog.pageType == &quot;item&quot;'>
            <div style="float:center;">
            followed by Your Converted Chitika or Adsense code 
            </b:if>
            <data:post.body/>


HappyBloggingBloggers ♥ ♥ ♥Earn More

How To Remove Footer Credit Link From Blogger (Step by Step Process)

Posted on with 11 comments

How To Remove Footer Credit Link From Blogger

Can I Remove Footer Credit Link From Blogger
Remove Footer Credit Link From Blogger

If you have applied custom template to your blog in blogger, so many of them facing this problem thats why am writing this tutorial.If you are trying to Remove  Footer Credit Link From Blogger blogger automatically redirects template owner site.Especially those templates download from 'seobloggertemplate.com'.No one can't find those code to Remove Footer Credit Link From Blogger. They were applying java scripts to templates to give security.This will provide good templates some of them are free.But they can't give solution to Remove Footer Credit Links From Blogger.

Anyway i will give you simple technique

Process: Remove Footer Credit Link From Blogger.

Follow These Steps:
________________

1.First you! Backup your template before you make any changes in your template.

2.Go to --->Blogger dashboard--->Template--->Edit HTML.

3.This is where you have to work. See, there is no fixed structure for these Javascripts,using which the author can protect their template. It can be added anywhere. Even using some other names. The only intention is the security of their theme. So, take a look at each line of your code. Here am working on a “seobloggertemplate” template. At the top only you can see a javascript code,


<script src=’//code.jquery.com/jquery-1.10.2.min.js’/>

As you can see in the image, it is quite simple, this is the code snippet which makes your Blog redirect when you try to edit the Footer credits. So just remove that line of code from the Template & Save Template.

4. Now go to the bottom of the code. There you will be able to see the credit texts,something like,

<div class=’creditfooter’> Designed By <a href=’http://www.samplesite.com/’ id=’importantlinks’> SampleSite</a> </div>

5. Remove the above text with the code you want to appear on your Footer, see below,

<div class=’creditfooter’> © 2014 <a href=’http://www.mybloggerworks.com/’ id=’importantlinks’> My Blogger Works </a> | All rights reserved. </div>

6. Thats’s all. Now got your Blog. You’ll be able to see the Footer with the text you typed, also without any redirecting problem.

[ The above is only for some of the templates. You may not see the above code in some of the templates, below is another code i found on a template, same downloaded from"seobloggertemplates".

<script src='//ajax.googleapis.com/ajax/libs/jquery/1.10.2/jquery.min.js'/>

If you are seeing this code, then just remove it and follow the 4th & 5th steps.]


Still having problems?? Please let me know. If you have any doubts, leave a comment below. I’ll help you. :) Also consider sharing it & G+ if you find this useful.


How To Write (Meta) Description In Blogger

Posted on with No comments
Write Blog Description

Writing description is very important to every blogger to become a successful blogger  .Because if you want to Get Hug Traffic then Description will take very important role. So keep going on write good description about your website and about your post.This is part of SEO.

Here is question for bloggers how to write description blogger.In Blogger Don't need to go for Meta tags In Html Code to write Description. Description in Blogger two types, first one is Description about your blog 


How To Write Description Of My Blog OR Website In Blogger

1.LogIn to Blogger 

2.Goto settings|Basic

Here is Example with picture
Write Description or Meta Tag


Then Click on Save changes after writing of your blogger description.
Note: Description should Related to your blog or website and related to blog title.


How To Write Description Of Each Post In Blogger

Most of Bloggers writing their valuable words in blogs to educate people so this could be reachable to every one in the world.So you have to do Proper SEO for this. Writing description or writing description in meta tags is part of SEO Training.In blogger writing description is very easy.

Follow Steps:

1.After login into blogger

2.Click on post-at right side of post area you will see it.

Here is Example with picture
Write Description In Each Post Blogger

After writing post Description Click on DONE.
Note:Always write Good Description.It Must related to your Post.

I hope You Understand it clearly. Any Doubts Please Comment.


Create Own Blog (build website online) With Google Blogger

Posted on with No comments
Hello everyone to day I am going to tell you how to create a blog.
How To Start Online Website or Blog


Mostly bloggers using their platform as Blogger and Word press. Because these are giving free hosting  . Easy to use. Giving  Free templates , User can customize his blog easily  .  Blogging for sharing our thought with the world . Some website created to educate people . 

I stared my blog journey  with blogger because it is more friendly to user so that most of people were  choosing blogger as their platform to share their information or thoughts or Etc..


Blogs not only for Share thoughts, Can gain  money by placing advertisements on own blogs.


How earn money with blogs by placing ads


Create own blog in some simple steps with blogger


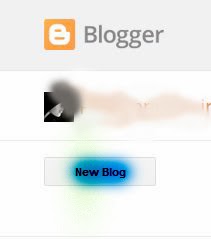
Go to Blogger with your gmail. New window will open at the top of left corner you can see like this Then click on “New Blog”
 

Free Blogging


By clicking on “New Blog” Following window will open here you can see like this


Title: Your Blog name.


Address: Your Blog Address (like..Mynewblog.blogspot.com)


Template: Choose suitable background for your blog.


Blogger giving some new templates. Select one of them then Click on “Create blog!”


SEO friendly website 

Now your blog is ready.  

You can see  your blog name(eg:myblog) like this after creation of blog.

Publish Content In Website

Then click on Your blog what you created. Then you can see window like this 


Easy Blogging


Now it’s time to create post.


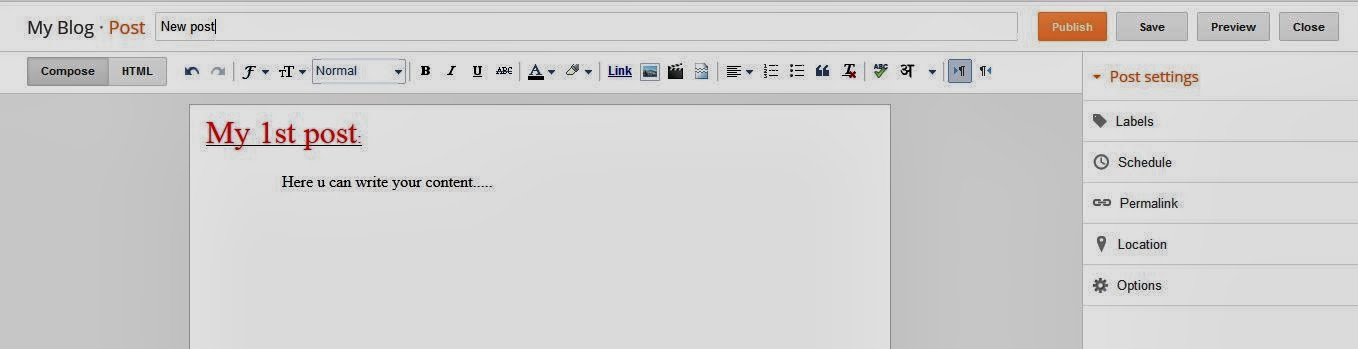
Click on “New post”. You can see like below window.


Click on Compose or Html. 

  • Here you can insert your image by Image tag, you can set font, you can insert web links etc..
Create Free Personal Website


After Completion of your post click on preview to see how post will be appear to public. If you found any mistakes correct them and click on publish. Blogger automatically saves data what you entering post wall.  You can see right side of above window like following picture. Here you can declare labels.
Google made blogging easy


If you want to change Template you can remember following things:


1.For every change “Backup/Restore”


   _Save it.


   _You can upload new template what you free template or premium template.


(OR)


If  you want to use blogger default Templates then simply select one of them. 

Website Built free


If you want arrange your blog with customized manner then click on “Layout”. Following window appear like this, here you can simply drag and arrange you layouts. Then click on “Save arrangement”.

Create Professional Website


Finally if you want to customize some settings then click on “Settings”. Then following window you can see!!!

Publish Content In Blog


I hope you enjoyed this article!!

If you have any doubts just comment below !!

 Thanks for visiting!! Keep visiting my site.

RECOMMENDED : Remove Secured Footer Credit Link From Template

Latest